Raising Butterflies Blog
Monarch Chrysalis Problems, Surprising Solutions, and Normal Development
This should be the simplest part of raising monarchs, but sometimes unexpected issues can arise as the caterpillar enters the 3rd stage of monarch metamorphosis. Chrysalis Problems + Surprising Solutions to Save More Monarchs...


Once your caterpillars complete their 2000% growth spurt from day 1 hatchling to 5th instar caterpillar, it’s time for the 3rd stage of the monarch butterfly life cycle...the chrysalis or pupa stage.
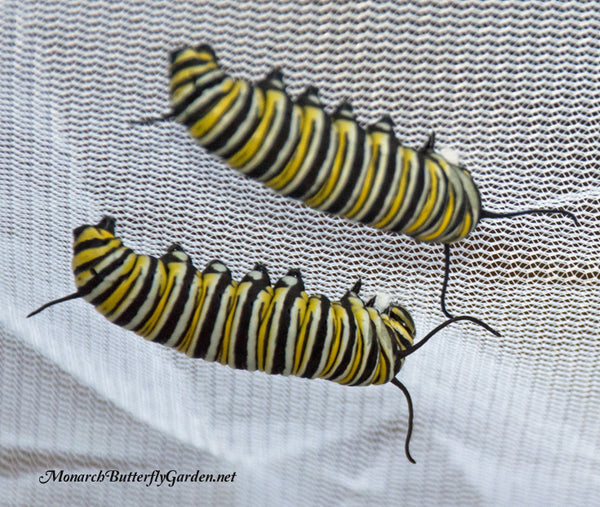
When ready to form a chrysalis, they’ll start by spinning a silk hanging pad…hopefully on top of the mesh cage like these two:
Next, they'll hang upside down from the silk pad to form the letter j:
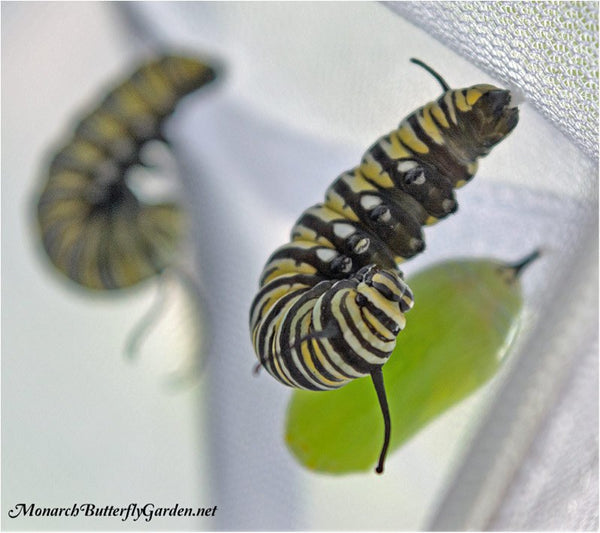
Don't be alarmed if your caterpillars remain in their j-hang for 24-36 hours. This is normal as they prepare for the 3rd stage of the butterfly life cycle. If temps are cool (low 70's fahrenheit and colder) expect longer hang times.
So how can you tell when the big moment is about to happen for your monarch larva? Look for these telltale signs:
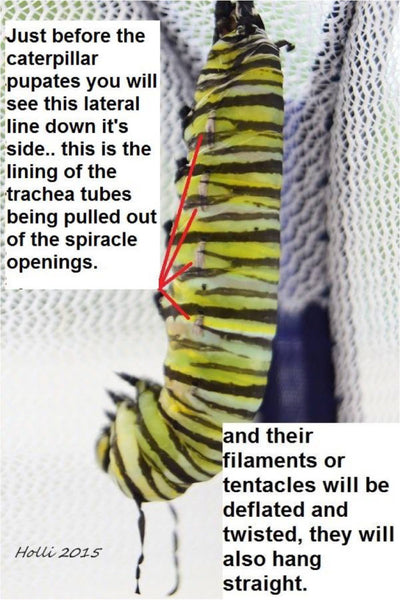
At the end of this transformation the old skin should fall to the floor, but sometimes it stays bunched up on top of the chrysalis...this will not be an issue for the emerging butterfly (2 weeks later) so you can leave it.
This should be the simplest part of raising monarchs, but unexpected issues can arise. The good news is, some of these issues have monarch-saving solutions you can implement…
Here’s how the process works with our suggested raising set up…
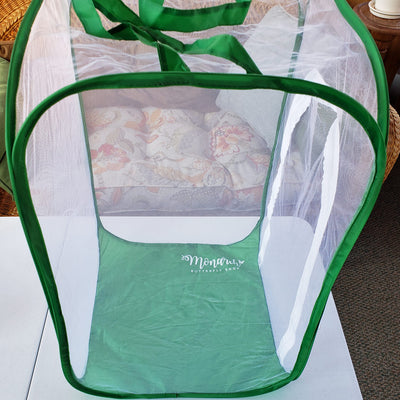
Mesh Pop-up Cages
- They are quite cooperative with forming their chrysalides directly on the mesh roof of the cage
- The side-opening door makes it easy for you to clean your cage and access other monarch caterpillars without bothering the chrysalides
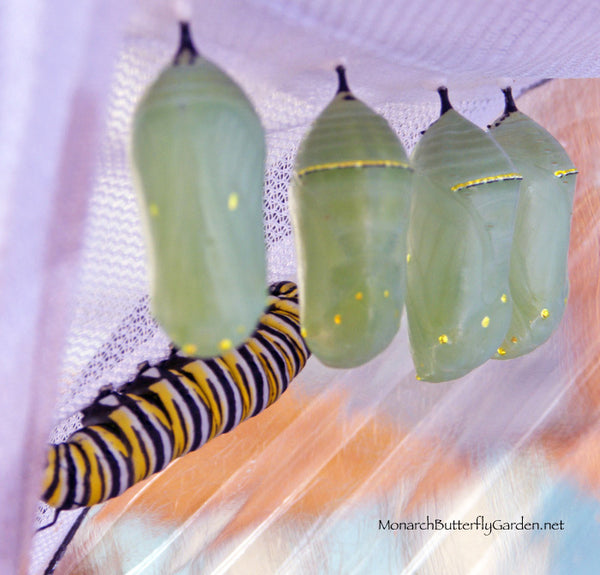
You will find that the caterpillars like to congregate in corners when making chrysalises…sometimes, ominously close to one another. I have tried moving them to a different corner of the cage before they form their silk pupation pad, but many times they crawl right back. Perhaps, this behavior is a ‘safety in numbers’ instinct…
I would not suggest moving chrysalises unless they’re touching and there’s a chance the two butterflies could emerge on the same day.
Cuttings or Plants
Unfortunately, sometimes we make plans…and caterpillars laugh! Some caterpillars will pupate underneath plant leaves. This is fine if there aren’t other caterpillars in your cage or if you can move the ‘J’ing caterpillar.
However, if other caterpillars are still eating the milkweed your poor caterpillar/chrysalis could soon come crashing to the cage floor.
To avoid this tragedy, move the floral tube cutting with the hanging caterpillar to its own floral tube rack and move it to the other side of the cage, away from munching mouths. (You will still need to keep water in that tube so the milkweed doesn't dry out.)
If that’s not possible, cut off a small leaf piece with the chrysalis attached, and tape/pin it up on your caterpillar cage roof or underneath a cupboard:
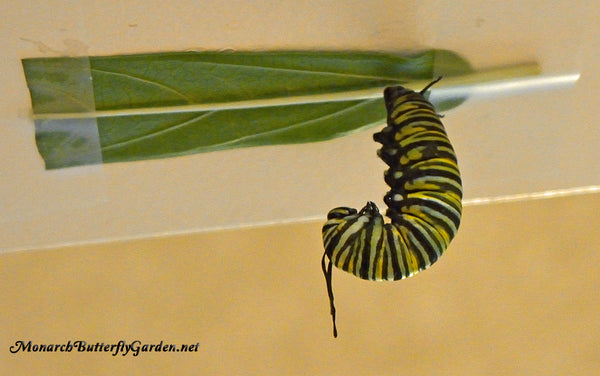
Advanced Raising Technique- Moving Chrysalides
You can also remove chrysalises and rehang them:
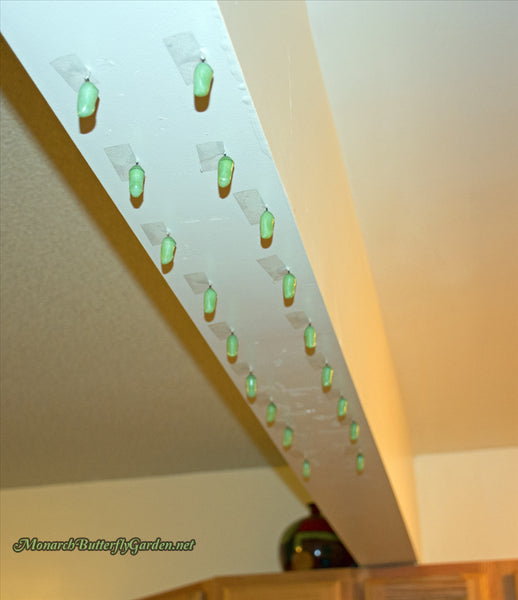
Moving chrysalises isn’t difficult, but it definitely takes practice. Over the past few seasons I have been introduced to some new ideas for accomplishing this nerve-wracking task with minimal risk to the monarch chrysalis and future butterfly.
Chrysalis rehanging is optional when raising monarch butterflies, but I do it for a few reasons:
1) Chrysalis falls or is likely to fall 2) Prevents overcrowding and chrysalis tampering from other caterpillars 3) Prevents hatching butterflies from spreading potential disease to feeding caterpillars below 4) Caterpillar pupates in inconvenient place (i.e. side of cage, plant pot) 5) to enjoy watching monarchs eclose from a convenient location…a fascinating experience!
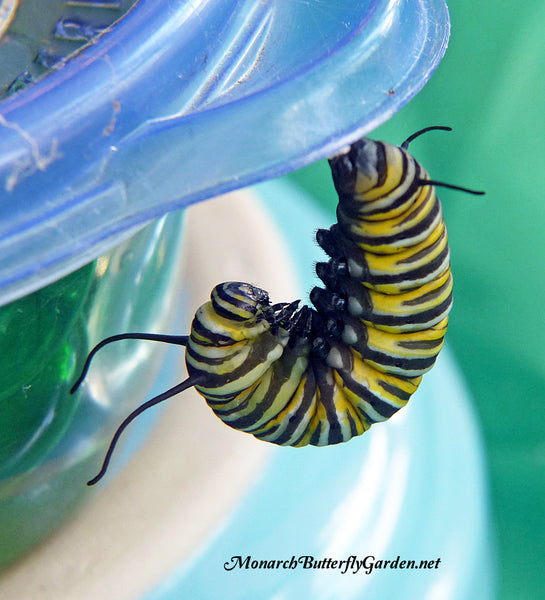
In this instance, the cuttings container was on the cage floor and the caterpillar was almost touching. The emerging butterfly would not have had room (4″+) to dry its wings properly.
You could either place the container on an object (I used the bottom of a flat bowl) to increase the hanging height, or try this…
Option 1- Steps for Removing & Rehanging a Chrysalis
- Let chrysalides dry at least 48 hours before transferring
- Carefully turn the cage, cage lid, cutting container lid, or milkweed leaf upside down so the chrysalis is laying on the floor and can’t be accidentally dropped
- Spray the silk above the black cremaster with water to make the next step easier…
- Use a needle-nose tweezers, pin, or a toothpick to gently loosen the silk attached to the top of the cage
- Pull up the silk/chrysalis together and set down in a safe place (e.g., a towel on a table)
- Leave a bit of silk (as shown below) and press it to the ceiling of the mesh cage
- Put the pin through the top of the cage and into the silk and back out through the mesh
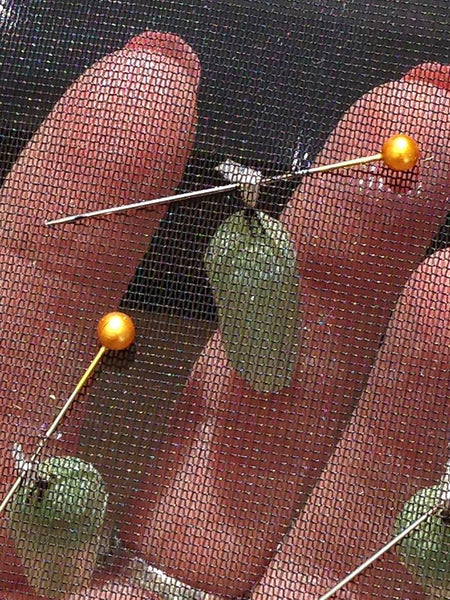
Tip 1: Problems pulling up the silk? Spray the silk button and silk around the chrysalis with water. This makes it easier to pull up the silk.
Tip 2: Nervous about falling chrysalides? Place a towel on the cage floor to give it a soft landing…just in case.
Option 2- Steps for Removing and Rehanging a Chrysalis
- Carefully turn cage, cage lid, or leaf upside down so the chrysalis is laying on the ground and can’t be accidentally dropped
- Spray the silk above the black cremaster with water to make the next step easier…
- Use a needle-nose tweezers, needle, or a toothpick to loosen the thread attached to the top of the cage
- Pull up the silk/chrysalis together and set down in a safe place (eg: a towel on a table)
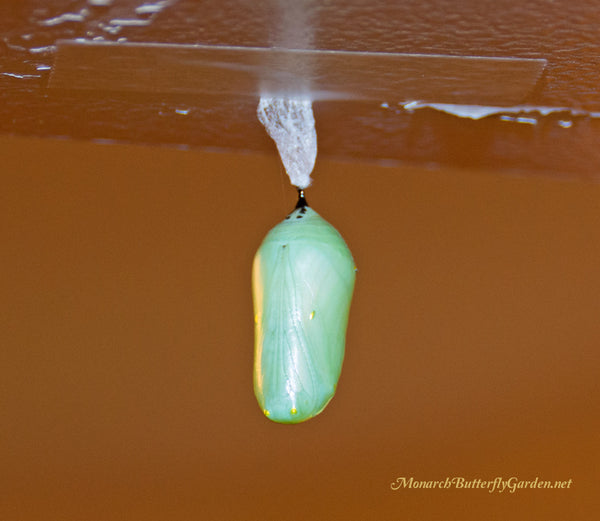
- Stick at least half of the white silk above the chrysalis on to a piece of scotch tape to rehang the chrysalis to a place where the tape will stay secure (we did this under successfully under our kitchen cupboards)
- Place a towel underneath in case chrysalis falls
Floral Tube Option
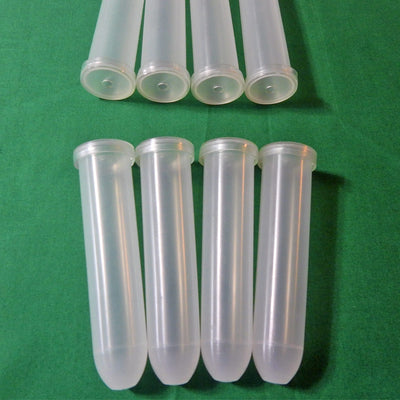
- Use your floral tubes + rack
- Carefully turn cage, cage lid, or leaf upside down so the chrysalis is laying on the ground and can’t be accidentally dropped
- Spray the silk above the black cremaster with water to make the next step easier…
- Use a needle-nose tweezers, needle, or a toothpick to loosen the thread attached to the top of the cage
- Pull up the silk/chrysalis together and set down in a safe place (eg: a paper towel on a table)
- Stick at least half of the white silk above the chrysalis on to a piece of scotch tape
- Wrap the tape piece around the end of a cotton swab
- Bend the other end of the cotton swab and stick it through the lid of an empty floral tube
- position the tube at the edge of the rack so if the butterfly falls, it won't fall inside of the rack pegs
- stick another piece of scotch tape over the lid hole to secure the cotton swab inside
This is the most secure way we've found to rehang chrysalides because:
- The chrysalis won't fall because the silk is ultra-sticky on tape
- The butterfly has enough room to hang down and dry properly
- If the butterfly falls, it's only a short distance so it won't get injured and can climb up a mesh cage wall

Hanging By A Thread
I’ve had caterpillars hanging by a single strand of silk. I thought for sure the strand would break and they would fall. Miraculously, one strand did the trick…it it a testament to how incredibly strong their spun silk is.
If a caterpillar or chrysalis is hanging by a thread, simply place a towel beneath it, so it has a soft place to fall…just in case!
Or, cut the thread and try this…
What If There Is a Problem Before The Chrysalis Is Formed?
I recently discovered this was possible and thought it might be being useful to somebody:
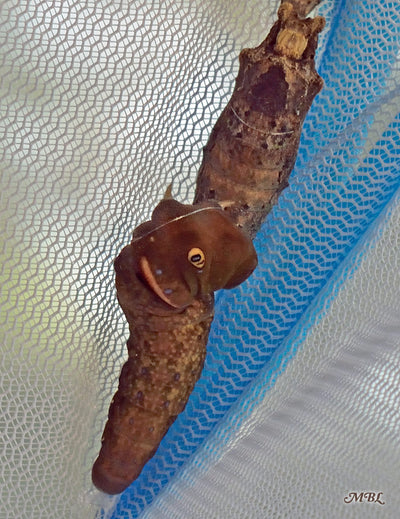
Amazingly, a caterpillar can pupate lying on it side!
If you're lucky enough to catch the caterpillar forming its chrysalis, touch a cotton swab tip to the top of the black cremaster and the chrysalis might attach like the chrysalis on the 'No tape' side below:

As you can see, it's attached but looks in danger of falling. Wrapping a piece of scotch tape around the silk, top of cremaster, and the cotton swab will better secure it.
Soft Chrysalis Chrysalis Down!
If the chrysalis falls while it’s soft and still forming:

- If it’s oozing lots of green liquid after the fall and deflates, it’s probably not going to survive
- If it didn’t fall far, and it’s not oozing (too badly) rehang the chrysalis so it can finish forming properly and so the butterfly can eclose (hatch) and dry its wings normally
- Tape chrysalis by the white silk above its cremaster (black part above the chrysalis) to an overhang or another surface where tape will remain secure OR
- Try to get the wiggling black cremaster of the soft forming chrysalis to attach to a cotton swab or cotton ball and rehang using the floral tube method OR
- Guide the chrysalis on to a paper towel and let it finish forming at ground level
If a soft chrysalis is left on the ground to harden, the side touching the ground can flatten slightly from the pressure, but the butterfly should still develop normally. I would still rehang the hardened chrysalis with dental floss (explained below under the hard chrysalis down section)
Hard Chrysalis Down!
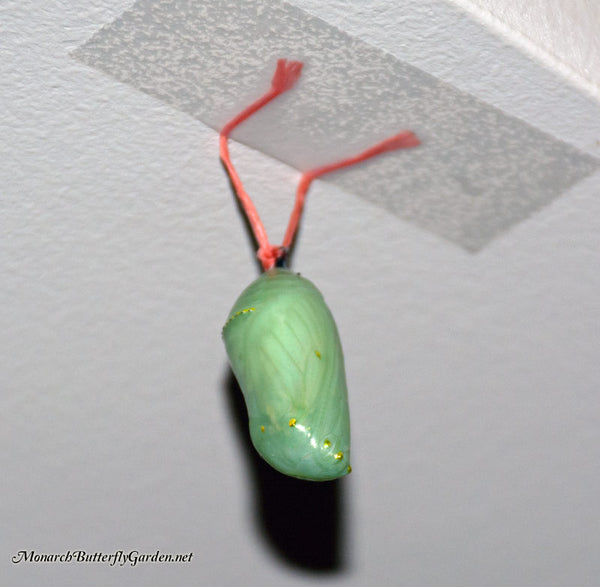
If the chrysalis is already fully formed and hardened you have more options:
- Tie waxed dental floss around cremaster (black part above chrysalis) and tie it to a hook securely so it can hang down OR
- wrap and tape the waxed dental floss around a cotton swab and use the floral tube method OR
- Put chrysalis on a clean paper towel on the cage floor near a mesh wall and tape the silk above the cremaster to the floor to keep it in place. When it ecloses (hatches), a healthy butterfly should be able to climb the side of the mesh and hang itself to dry:
No chrysalis silk to tape to the paper towel? 😱 Use a clean microfiber cloth (no chemicals) instead and hook the cremaster (black stem) to it. The microfiber cloth can be hung up or laid on the cage floor by a mesh wall:

Again, our preferred method for safely rehanging chrysalides is the floral tube method listed above. The other methods can work, but are not as reliable...
My Chrysalis Looks Funny
Sometimes chrysalis diseases, parasites, and pesticide exposure symptoms rear their ugly heads during this phase. If you believe your chrysalis might be compromised, check out the following links for more info about potential monarch chrysalis problems:
Monarch Chrysalis NPV Virus and Bacterial Infections
Monarch Chrysalis Parasite Chalcid Wasp
Monarch Chrysalis Parasite- OE
Monarch Chrysalis Parasite- Tachinid Fly
Monarch Chrysalis Problems due to Pesticide Exposure
If your chrysalis has been completely dark for 48 hours or is visibly diseased, it’s best to euthanize the chrysalis. Some people have a hard time euthanizing monarchs, but if you release visibly diseased butterflies on to your garden plants, you are spreading disease to future monarchs.
Euthanize by placing the chrysalis inside a paper towel and squeezing inside a lined trash can or put it inside a plastic baggie and place inside the freezer for 48 hours before discarding.
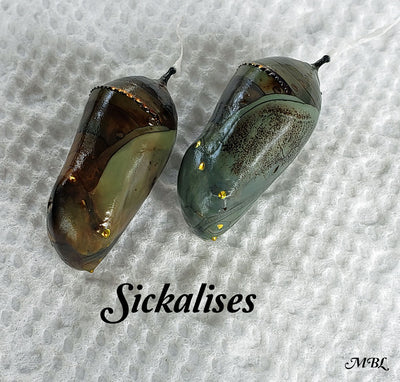
If you’re unsure about chrysalis health, my best advice would be to separate the chrysalis from the others and watch it closely to see what happens. The chrysalis below was from a past Raise the Migration. It had two symmetrical black lines that looked worrisome.
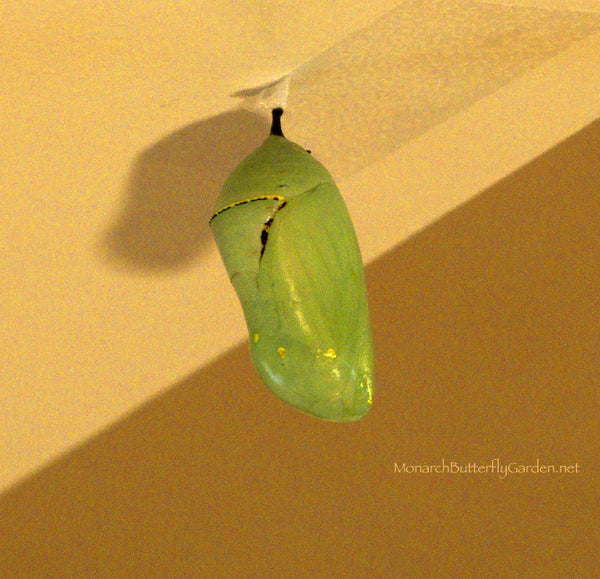
The caterpillar pupated while a few others were crawling around the cage roof…could another caterpillar have done this? I wasn’t sure so I moved the chrysalis and waited for nature to take its course…
10 days later, this questionable chrysalis unveiled a healthy monarch butterfly. Yes, sometimes disease/injury concerns have happy endings! 🤗
Chrysalis Cookies?
People are sometimes horrified to find that chrysalises have been eaten by their cage mates. In 40 years, this is also something I have never encountered raising caterpillars. I have a theory to why this might be happening to some…
If you’re raising with waterless leaf or stem cuttings, they dry out quickly and the caterpillars will wander away to find fresh milkweed. Their milkweed quest will often take them to the top of the cage where they won’t find milkweed leaves, but milkweed chrysalis cookies instead…
Again, that’s just my theory…but, if you have issues with this, consider switching to stem cuttings or potted plants to see if fresher milkweed stops this disturbing behavior. 😱
SAFE reasons for a caterpillar to be on the cage roof:
- large caterpillar ready to form a chrysalis
- small caterpillar ready to form a chrysalis- monarchs (just like people) can come in smaller sizes. Undersized caterpillars are less common with the super-sized migration generation.
DANGEROUS reasons for a caterpillar to be on the roof and the catalysts for chrysalis munching:
- No milkweed in the cage
- Dried up milkweed in the cage
- Overcrowded cage
FUNNY reason for a caterpillar to be on the roof:
I’ve seen this behavior enough to know that others have seen it too. When there’s a group of caterpillars in the cage, the last caterpillar that crawls up sometimes isn’t ready to pupate, but rather, it doesn’t want to be left behind…perhaps that safety in numbers instinct again?
This just happened recently, so I gently peeled the bothersome, undersized caterpillar off the cage roof and back on to fresh milkweed, where the caterpillar feasted for another full day. 24 hours later, it was back on the roof finally prepared to enter the next stage of the monarch life cycle.
So, are you scared yet? Don’t be. These situations rarely happen in my experience, but I want you to be prepared if a pupation problem arises. Many of you will get through this part of the life cycle without any monarch chrysalis problems and, if lady luck is on your side, you may even witness this miraculous moment in monarch metamorphosis!
For more info on chrysalis problems and raising healthy monarchs through the butterfly life cycle, or ✬✬✬✬✬ rated How To Raise More Monarchs, with Less Effort book is available for purchase HERE <<< (choose paperback or PDF download)


